

A complete printed installation guide is included in the product box. You can download an extra copy here.
We’ve designed the Camera Floodlight to replace your existing light fixture in a few easy steps. Just take down your old fixture and connect the Camera Floodlight to your existing power wires, then mount the light to your junction box.
WARNING: 120V AC light installation requires knowledge of lighting and electrical systems. Do not attempt to install a Camera Floodlight yourself if you are unfamiliar with outdoor lighting. Please contact a qualified electrician if you have any questions or need assistance.
Planning Your Installation
Before assembly, turn power off at the circuit breaker or fuse. Ensure that all parts are present. Compare parts with the “Hardware Included” and “Package Contents” sections. If any part is missing or damaged, do not attempt to assemble, install or operate this fixture. Please call or email Kuna Support right away!

Safety Information
THIS PRODUCT MUST BE INSTALLED IN ACCORDANCE WITH THE APPLICABLE INSTALLATION CODE BY A PERSON FAMILIAR WITH THE CONSTRUCTION AND OPERATION OF THE PRODUCT AND THE HAZARDS INVOLVED.
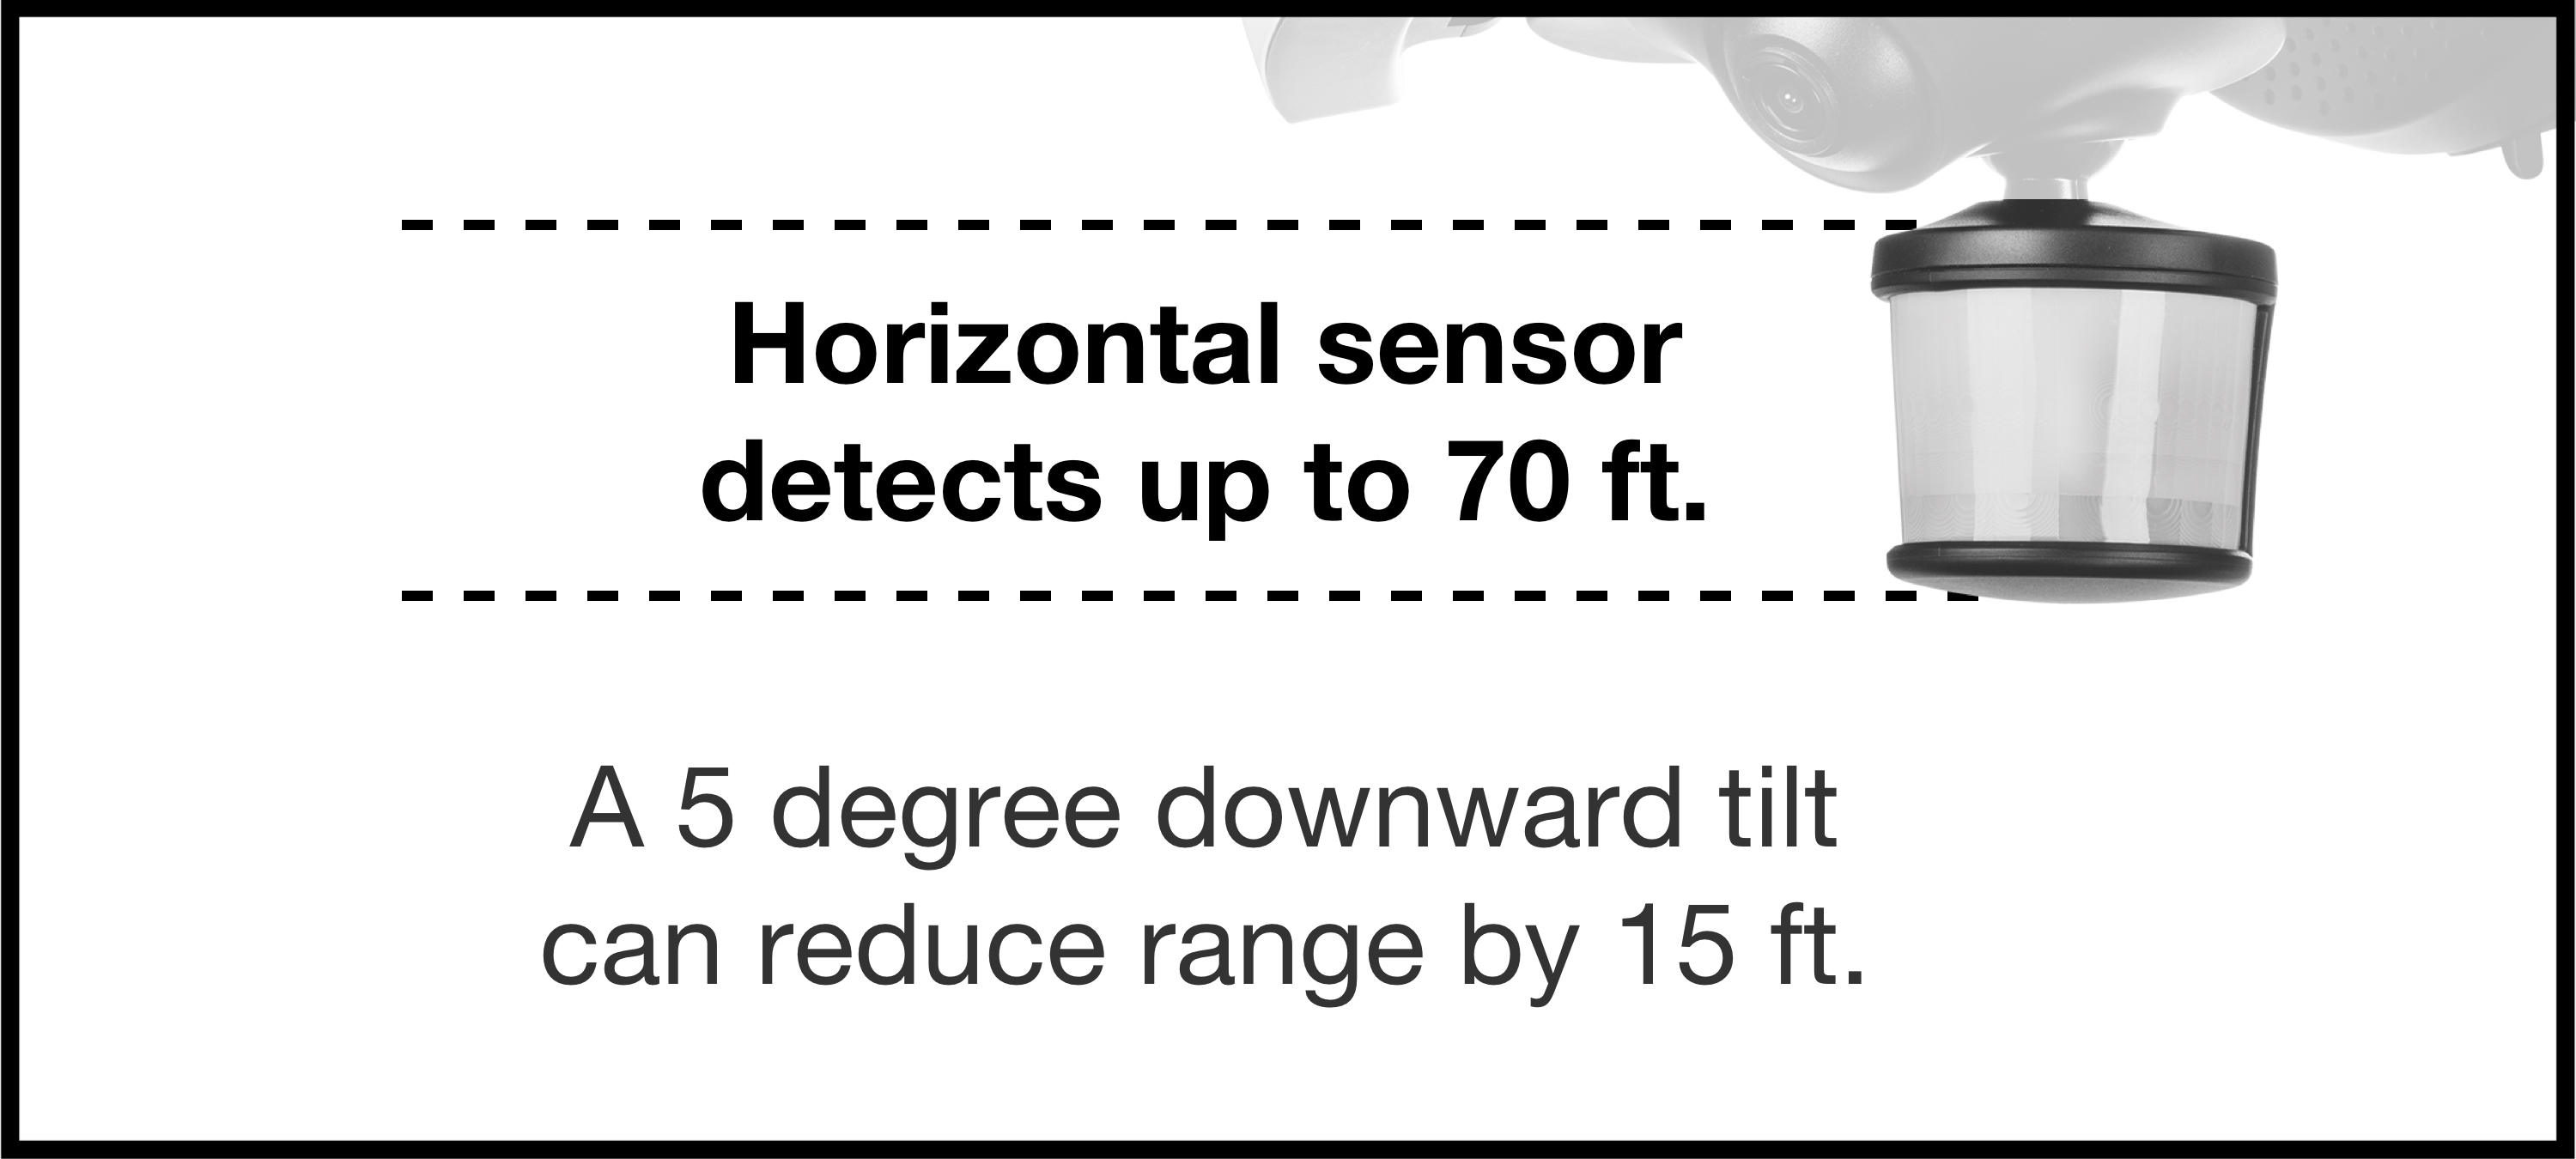
This product requires a 100-277V power source. This light fixture should be installed outdoors to a wall or eave (ceiling under an overhang). The light fixture should be mounted approximately 8 (2.4m) above the ground. If the light fixture is mounted higher than recommended, aiming the sensor down will reduce the coverage area.
Installation Steps
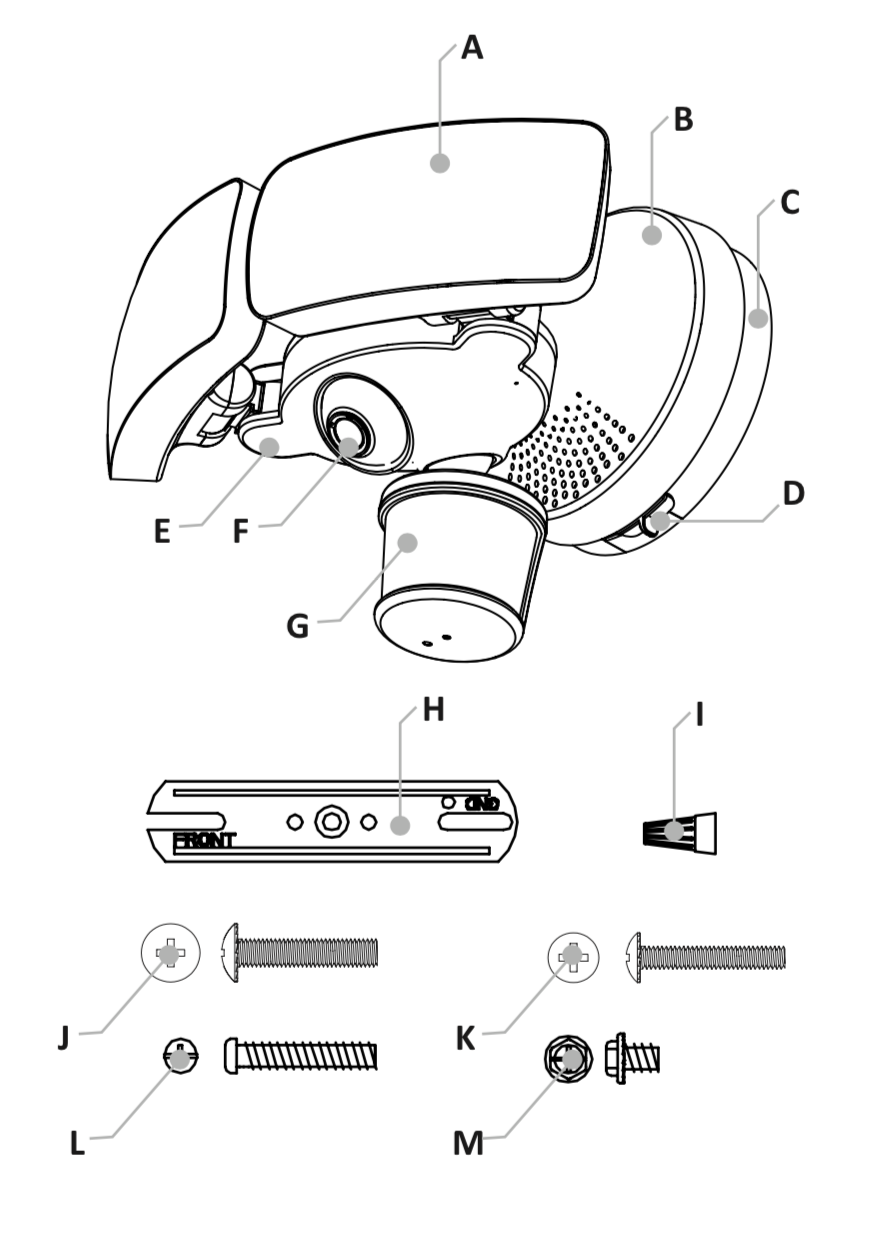
Step 1: Determine desired mounting location on a wall or an eave (ceiling). If you're planning to mount the Camera Floodlight on a ceiling, the ‘Up’ arrow should face the direction to be monitored.
Step 2: Unlock the locking switch (D).
Step 3: Remove mounting plate (C) from fixture by turning plate clockwise.
Step 4: Remove the existing light fixture and install the mounting bracket (H) with the stamped word “FRONT” facing away from the junction box. Use the mounting bracket screw (L) to x the mounting bracket. Firmly pull on the mounting bracket to verify it is securely mounted to the junction box.
Step 5: Use connector (I) to complete wiring. If your junction box setup includes a ground wire, use the ground connection on screw (M) to connect your ground wire with mounting bracket (H).
Step 6: Use M5 screw (J) to link the mounting plate (C) with mounting bracket (H), the screw should not be fixed too tight.
Step 7: Adjust the mounting plate (C) to make sure the air bubble in air level is in the middle. Link the M4 screw (K) on mounting bracket (H). Tighten M4 screw (K) and M5 screw (J).
Step 8: Align the bottom edge of the power supply compartment (B) with the bottom edge of the mounting plate (C). Insert the conducting post on power supply compartment (B) into the holes on mounting plate (C). Tilt and lock the locking switch (D).
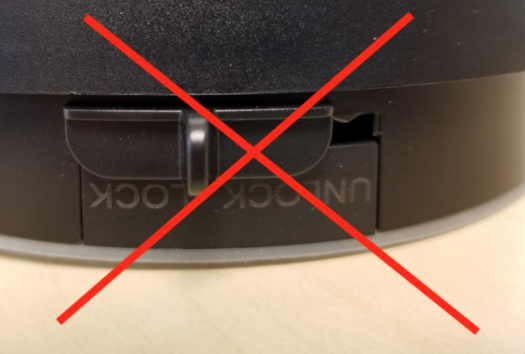
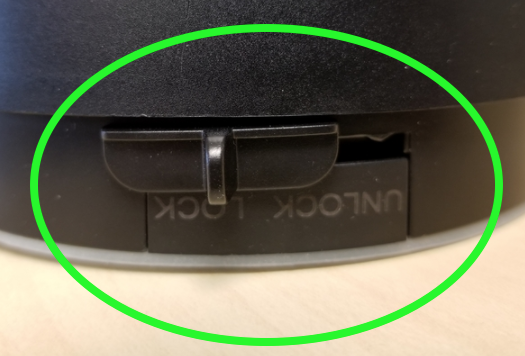
IMPORTANT: Please make sure the power supply compartment is firmly locked on the mounting plate, and the locking switch is moved as far as it will go. If either of these components are loose, the Camera Floodlight will not power on.
You may hear a click even if the power supply compartment is not fully locked. To ensure that your light is receiving power, make sure your switch is moved past the L in "LOCK".
Adjusting the Lamps
If needed, gently grasp the lamp heads (A) and tilt them up or down or side to adjust the light coverage area. The control compartment (E) is also available for limited horizontal rotation.
Adjusting the Direction of the Camera
Gently press the camera ball and change the direction of lens to get the best view.
Aiming the Motion Sensor (PIR)
Rotate the PIR compartment (G) to direct lens to desired target area.
IMPORTANT: Your Camera Floodlight's status LED is also located on the bottom of the PIR compartment. This will help you finish setting up your Camera Floodlight with the Kuna app.